
Lowered Car Alignment: Shop Checklist, Low Lift Needs, and Parts
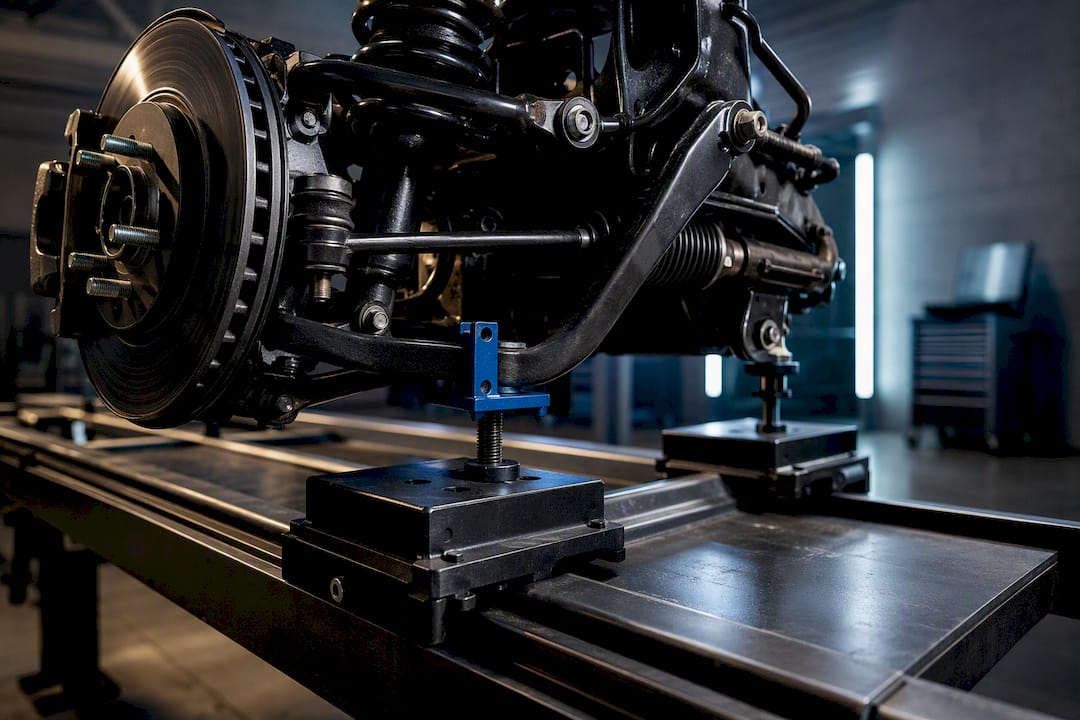
Yes, you need an alignment after lowering, and no, you shouldn’t do it the same afternoon you drop the car off the jack. Let the suspension settle for a few days or 100 to 200 miles, then get a full four-wheel alignment. Skip this and lowering’s camber and toe shifts will chew through your inner tread within a short distance of driving.
TL;DR:
- Waiting at least 100 to 200 miles after lowering your car before aligning prevents camber, toe, and caster from drifting out of spec.
- A 40mm drop can shift camber by up to 1.5 degrees within the first 2,000 miles if not properly adjusted.
- Using factory specs on a lowered vehicle often isn’t feasible; most setups need custom targets within a camber range of -1.5° to -2.5° for street cars.
- Shops must check ride height, suspension condition, and adjustability range before proper alignment; an improper setup risks uneven tire wear and handling issues.
- Sourcing adjustable suspension parts tailored to your specific chassis and using marketplaces with AI-driven fitment filters minimizes costly mismatches.
Table of Contents
- Wheel Alignment After Lowering: Why Camber, Toe, and Caster All Move
- When to Get an Alignment After Lowering Your Car
- What Happens During an Alignment for a Lowered Car
- Choosing the Right Alignment Target for Your Drop
- Pre-Alignment Checklist and How to Pick the Right Shop
- How to Tell Your Alignment Actually Worked
- DIY Alignment vs Hiring a Specialist
- Finding the Right Adjustable Parts for Your Lowered Car
- What I’d Prioritize If I Were You
- Where to Source Correct-Fit Parts for Your Build
- Sources
Wheel Alignment After Lowering: Why Camber, Toe, and Caster All Move
Every coilover kit or lowering spring set you install changes the angles your wheels sit at relative to the road, whether you asked for that or not. Three angles matter here, and each one moves for a different mechanical reason.
Camber is the tilt of the wheel when you look at the car head on. Lower the car and the control arms swing through a shorter arc, which usually pulls the top of the wheel inward. Toe is whether the wheels point slightly in or out relative to straight ahead, and it shifts because tie rod geometry changes angle as ride height drops. Caster affects steering feel and self-centering, and it moves less dramatically than camber but still enough to notice on a hard drop.
The numbers here aren’t trivial. A 40mm drop can push camber from around -1° to -2.5°, and as a rough rule of thumb, every inch of drop shifts static camber by about half a degree. That’s not a cosmetic detail. It’s the difference between a tire wearing evenly for 40,000 miles and one that’s bald on the inside edge before your first oil change.
Left unaddressed, that geometry shift shows up fast. Watch for:
- Uneven wear concentrated on the inside edge of the front tires
- A steering wheel that pulls slightly left or right on a flat, straight road
- Vague or wandering steering at highway speed
- Visible tread damage within roughly 2,000 miles of driving on a fresh drop
A 40mm lowering job can move camber by 1.5 degrees, and that alone is enough to cause pulling and uneven wear within about 2,000 miles if nobody corrects for it. That’s a fraction of a typical tire’s service life, gone because of a geometry problem an alignment machine fixes in an hour.
Caster changes tend to be smaller in magnitude but still worth checking, especially on cars where the lowering kit uses different bushings or mounting points than stock. A shop running a proper four-wheel alignment will pull all three angles at once rather than eyeballing camber and calling it done, which is the difference between a real fix and a half fix.
When to Get an Alignment After Lowering Your Car
Timing matters as much as the alignment itself. Book it too early and you’re aligning to geometry that hasn’t finished moving yet.
New springs need to compress under real driving loads before they settle into their final position. Bushings need a break-in period. Shocks need cycling. All of that happens gradually over the first stretch of driving, not the moment you lower the car off the jack stands. That’s why the standard advice is to drive at least 100 km, or roughly 60 to 125 miles, over a few days before aligning anything.
Here’s the practical timeline that most experienced techs and lowering specialists recommend:
- First 100 to 200 kilometres: drive normally to let springs, shocks, and bushings settle into their final compressed state
- First alignment: scheduled once settling is done, ideally within a few weeks rather than delayed for months
- Recheck: some weeks later to catch any late settling the first alignment missed
- Ongoing: treat it like any performance modification and recheck after major bump impacts, curb strikes, or a track day
Aligning too early is the mistake that costs owners money twice. If you set toe and camber before the springs finish compressing, the ride height keeps dropping slightly over the next week or two, and your careful alignment numbers drift out of spec right along with it. You end up paying for a second alignment that should have been the only one.
Professional alignment costs typically run between £80 and £150 depending on how complex the suspension is and how much adjustment it needs, so getting the timing right the first time isn’t just about tire wear. It saves you a repeat visit.
What Happens During an Alignment for a Lowered Car
A proper alignment on a lowered car looks different from the quick four-wheel check a shop runs on a stock sedan. Here’s the actual sequence a competent shop follows.
- Confirm final ride height first. The technician checks that all four corners sit at the height you actually intend to drive, measuring corner to corner for evenness before touching a single adjustment bolt.
- Inspect current tire wear and adjustability. This tells the tech how far out of spec you already are and whether your kit’s stock adjustment range can even hit your target numbers.
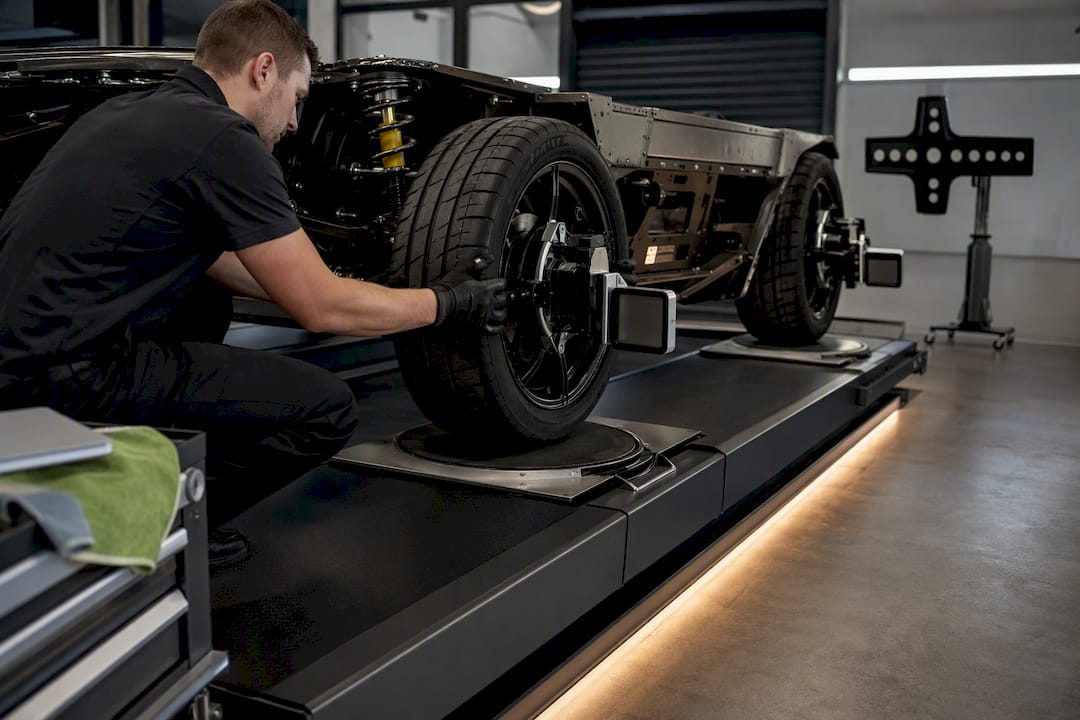
- Check ground clearance for the lift. Splitters, side skirts, and low front lips are a real hazard on a standard drive-on lift. Shops built for lowered cars use low-approach lifts or ramps specifically to avoid contact damage during this step.
- Mount the imaging aligner and set turn plates. The car goes onto turn plates and slip plates that let the wheels pivot naturally during measurement, which is how the aligner captures accurate readings on all three angles at once rather than guessing at static numbers.
- Agree the target spec before adjusting anything. This is the step most shops skip and most owners regret skipping. Street, aggressive street, and track alignments use different numbers, and a mismatch between what you wanted and what the tech set is the single most common source of comeback complaints.
- Adjust camber, toe, and caster to the agreed spec. Using camber plates, adjustable arms, or factory adjustment slots depending on what your suspension allows.
- Print before and after numbers. A shop that knows what it’s doing hands you both printouts, not just the final one, so you can see exactly what moved and by how much.
- Road test and final verification. The car goes out on a real test drive to confirm there’s no pull, no vibration, and no wander, then comes back for a final check on the rack if anything felt off.
Pro Tip: Ask for the before-and-after printout before you pay, not after. If a shop can’t produce both, they likely didn’t measure your baseline properly, and you have no way to confirm the adjustment actually happened the way they say it did.
Shops equipped for this kind of work use low drive-on lifts, imaging aligners that support custom specs, and integrated turn and slip plates as standard equipment, not special-order add-ons. If the shop you’re calling doesn’t mention any of that unprompted, ask directly before booking.
Choosing the Right Alignment Target for Your Drop
Factory alignment specs assume factory ride height. Once you lower the car, sticking rigidly to those numbers often isn’t even possible, and it isn’t necessarily what you want anyway.
Street-focused builds on a moderate drop generally land somewhere in the -1.5° to -2.5° camber range, which restores some of the contact patch lost to the lowered geometry without turning daily tire wear into a monthly expense. Aggressive street setups push further negative for cars that see regular hard cornering. Track-focused alignments go further still, but that decision depends heavily on tire compound and how much wear you’re willing to trade for grip.
More negative camber increases cornering grip by keeping more tire flat against the road under lateral load, but it accelerates wear on the inside edge of the tread every time the car goes back to driving in a straight line. That tradeoff doesn’t have a universal right answer. A commuter car benefits from staying closer to factory numbers even after lowering. A weekend track car can justify eating through tires faster in exchange for cornering speed.
Where this gets complicated is when your lowering kit simply doesn’t have enough adjustment range to hit the target you want. Stock control arms and mounting points only allow so much camber correction before they run out of travel. When that happens, the standard fix is aftermarket adjustable parts: camber plates up front, adjustable control arms in the rear, sometimes adjustable tie rods to correct toe once camber changes shift that angle too.
A good technician checks your adjustment range before starting the job, not halfway through it. Finding out mid-alignment that your stock arms can’t reach the target spec means either settling for less camber than you wanted or coming back for a second appointment once the right parts arrive.
Pre-Alignment Checklist and How to Pick the Right Shop
Half the battle here happens before you ever drive to the shop. Get these things right first and the actual alignment appointment goes faster and costs less in comebacks.
Before you go:
- Set your final ride height and confirm it’s even across all four corners, not just close.
- Check tire condition and pressure. Uneven wear already present tells the tech something useful about how far off you are.
- Torque your wheels to spec if you’ve had them off recently for the lowering install.
- Center the steering wheel manually so the tech starts from a known reference point.
- Note your driving priorities: daily commuting, weekend spirited driving, or track days. The answer changes the target spec.
What to look for in a shop:
- A low drive-on lift or approach ramps rated for lowered vehicles, not a standard full-height lift that risks scraping your splitter or lip.
- An imaging aligner capable of accepting custom specs rather than only factory presets pulled from a database.
- Integrated turn plates and slip plates built into the alignment bay, since these let the wheels move naturally during measurement instead of forcing static readings.
- Direct experience with modified and lowered suspensions, which you can usually confirm just by asking how many they handle in a typical week.
- A documented recheck policy, ideally free or discounted, within a set mileage window after the initial alignment.
Ask the shop to write the agreed target spec directly on your job card, along with any note about adjustable parts installed and the recheck window they’re offering. That single piece of paper is your reference if anything drifts later, and it’s the fastest way to spot a shop that’s guessing versus one that actually works on cars like yours regularly.
How to Tell Your Alignment Actually Worked
The test drive right after the appointment tells you most of what you need to know, and the next 500 miles confirm the rest.
Right away, check that the steering wheel sits centered when you’re driving straight, that the car doesn’t pull toward either shoulder on a flat road, and that handling feels stable rather than twitchy or vague. Any of those failing on the drive home is worth a call back to the shop before you’ve put real mileage on it.
Once you’ve put around 500 miles on the fresh alignment, look for:
- Even tread wear across the front tires, checked by running a hand across the surface or a simple tread depth gauge
- No new vibrations at highway speed that weren’t there right after the appointment
- Consistent handling in corners and under braking, without the car feeling different from one day to the next
Bring the car back if you notice a persistent pull that wasn’t there initially, a wear pattern developing unevenly on one tire versus its pair, or any handling quirk that shows up only after a few hundred miles. A shop with a real recheck policy, often offered free or discounted within a set window, expects exactly this kind of follow-up and won’t treat it as an inconvenience.
DIY Alignment vs Hiring a Specialist
A careful, patient owner with the right tools can get reasonably close on a simple setup. Where the job gets genuinely risky is anything beyond a basic drop on a common platform.
What DIY realistically covers:
- Measuring camber with a bubble gauge or digital camber tool
- Checking toe using string lines, toe plates, or a laser kit
- Setting the steering wheel center manually before final toe adjustment
- Basic ride height verification with a tape measure at all four corners
Where DIY runs into trouble: jacking the car up to access adjustment bolts unloads the suspension, and readings taken in that unloaded state don’t always match how the car sits under its own weight once it’s back on the ground. That gap is exactly why DIY alignment guides stress double checking every measurement after the car is fully weighted and settled, not while it’s still up on stands.
Specialists earn their fee on anything more complicated than a basic spring drop. Extreme drops, low-clearance splitters that need a specific lift approach, complex multi-link rear suspensions, or a build that needs camber plates and adjustable arms installed correctly are all situations where a home setup risks getting expensive fast if it’s wrong.
Pro Tip: If you’re set on DIY, at least pay a shop for the toe adjustment. Camber tolerance is more forgiving than toe tolerance, and a toe error of even a fraction of a degree translates into rapid, expensive tire scrubbing.
On cost, a basic alignment sits at the low end of that £80 to £150 range mentioned earlier for straightforward setups. A full four-wheel alignment on a lowered car with adjustable parts runs toward the higher end, since it takes longer and needs more careful measurement. A performance alignment with corner balancing costs more still, since shops often charge a premium for the extra bay time and specialized setup that corner balancing demands.
Finding the Right Adjustable Parts for Your Lowered Car
When your stock adjustment range can’t hit the camber or toe numbers you need, the fix comes down to a short list of parts: camber plates for the front strut mounts, adjustable control arms for camber and caster correction, and adjustable tie rods to dial toe back in once camber shifts change that angle too.
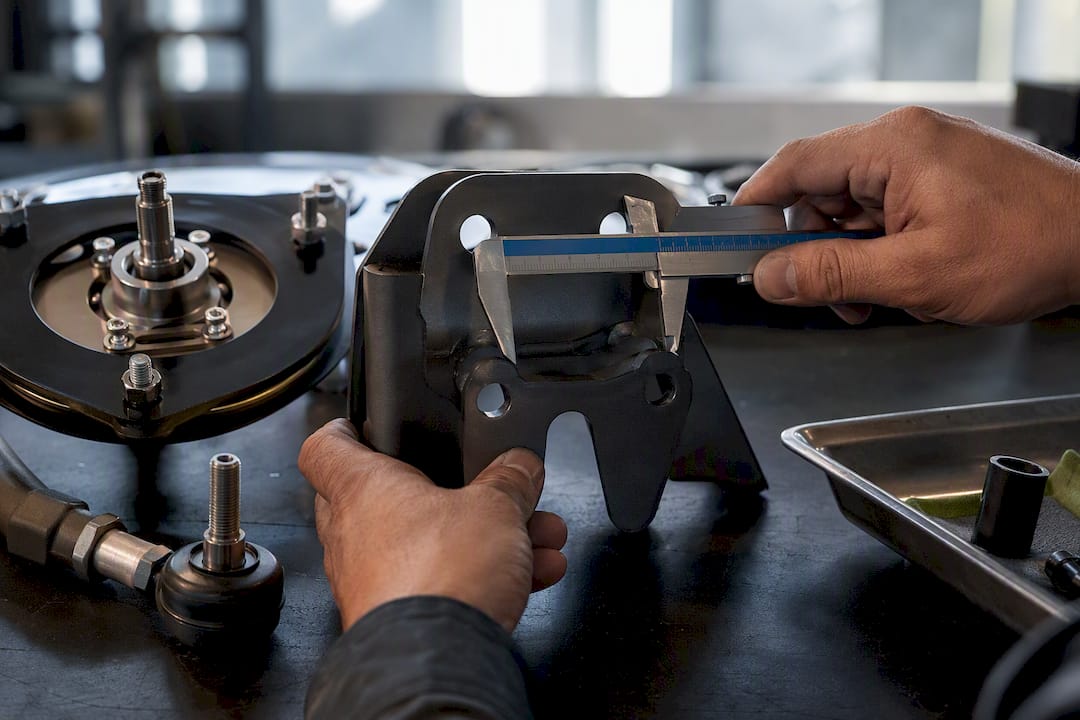
Fitment is where this gets unforgiving. A camber plate or control arm that’s off by even a small margin in OEM part number or offset can bind, wear unevenly, or simply fail to deliver the adjustment range you paid for. That matters more on exotic and performance platforms, where the aftermarket catalog for adjustable suspension parts is thinner than it is for a common commuter car, and a wrong-fit part isn’t something your local parts counter can swap same day.
That’s the exact problem a focused parts search solves. Supercars maintains a marketplace of over 365,000 listings covering OEM and aftermarket components, with AI-driven search built to match exact part numbers and fitment rather than making you guess from a generic category page. For an owner trying to source the right camber plate for a specific chassis, that kind of precision search turns a frustrating hunt into a straightforward lookup.
What I’d Prioritize If I Were You
If you only take one thing from this, take this: set your final ride height, drive it for a week to let everything settle, then book a four-wheel alignment and insist on getting both the before and after printouts.
That paperwork is your proof the shop actually measured your car instead of eyeballing it. Skip the settling period and you’re paying for two alignments instead of one. Skip the printouts and you have no way to know whether the numbers you agreed to are the numbers you actually got.
— Artem
Where to Source Correct-Fit Parts for Your Build
Once your alignment reveals you’re out of adjustment range, the part search starts, and that’s exactly where a focused marketplace beats scrolling through generic listings hoping something fits.

Some specialized marketplaces focus on solving the problem of finding parts that actually match a specific chassis and OEM part number, rather than just something in the same general category, using extensive listings and AI-driven search to narrow results to precise fitment, helping buyers avoid guesswork that causes parts to fail to fit. If your alignment shop flagged a range problem or you’re planning ahead for a bigger drop, search Supercars for the specific adjustable component your platform needs and check the listing details against your own part numbers before you order.


